
Want to boost your account security? Worried about the damages a hacker can do to your career and personal life by accessing your accounts? That’s exactly why Cybersecurity has become an essential subject in recent decades.
There are various ways to fortify the security of our devices and accounts. One of the easier but more effective ways is to enable Two-Factor Authentication. In this tutorial, we will first take a quick look at what two-factor authentication means and why it’s important. We’ll then discuss how to enable two-factor authentication on Windows 10. In case you already know enough about the subject or just don’t have much time, you can skip that part and jump right to instructions on how to enable two-factor authentication on Windows 10 or you can watch the video below.
What is Two-Factor Authentication, and Why does it Matter?
Traditionally, to log in to an account or device, all you needed was a username and a password. But, passwords can be hacked, and usernames can be stolen. That’s where two-factor authentication comes in. It works as an extra layer of protection. For example, when you want to log in to your Microsoft account, you will receive a code through an app or a text or an email and you will have to input that code after your password. Therefore, even if your password has been hacked, you will still be safe. The verification code adds another layer of security and the hacker will not be able to access your account. Also, anytime you log in to your device, you will receive a new code on your other confirmed devices or email. This simple move guarantees that nobody other than you is using your devices.
With the concept out of the way, we will now dive right into the solution.
Also Read : List of the 6 Best Firewalls for Windows 10 for 2022
Enabling Two-Factor Authentication on Windows 10
Microsoft’s two-factor authentication is quite straightforward. To set up two-factor authentication, you just have to follow these steps:
Step 1: Sign in to Your Microsoft Account
Go to the Microsoft account login page and log in with your username and password. If you don’t have an account you can create a new one here.
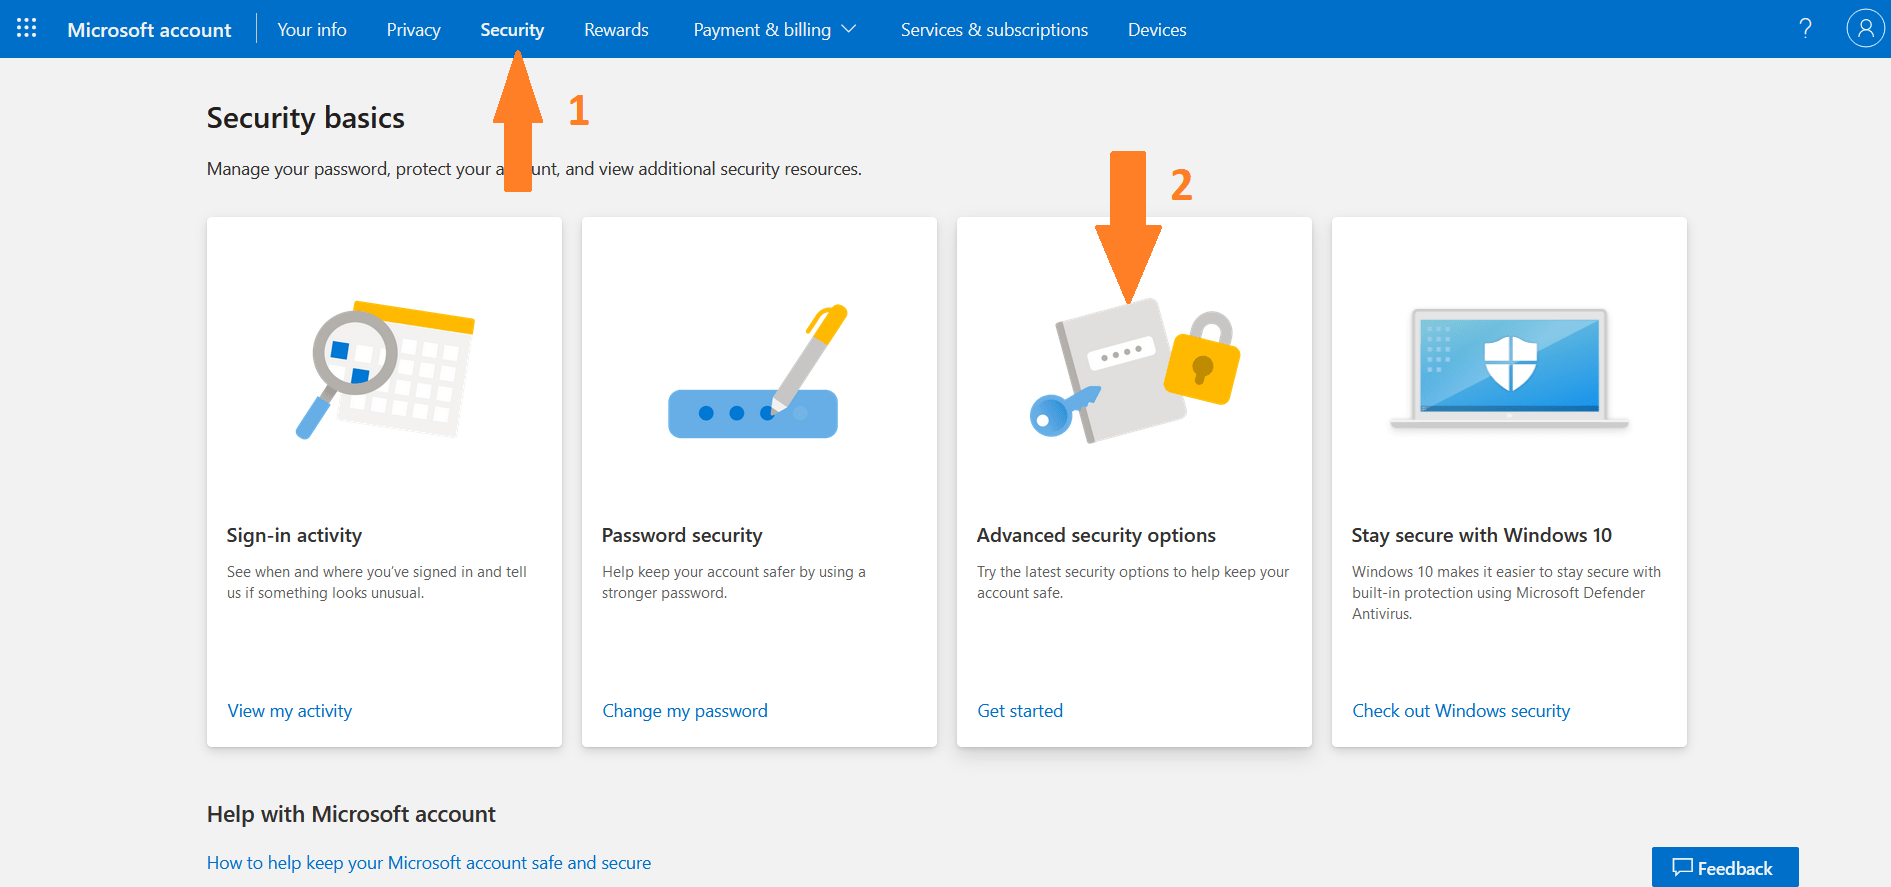
Step 2: Go to the Security Page
Click or tap on the Security tab from the top menu. In the Security screen, click on Advanced Security Options.
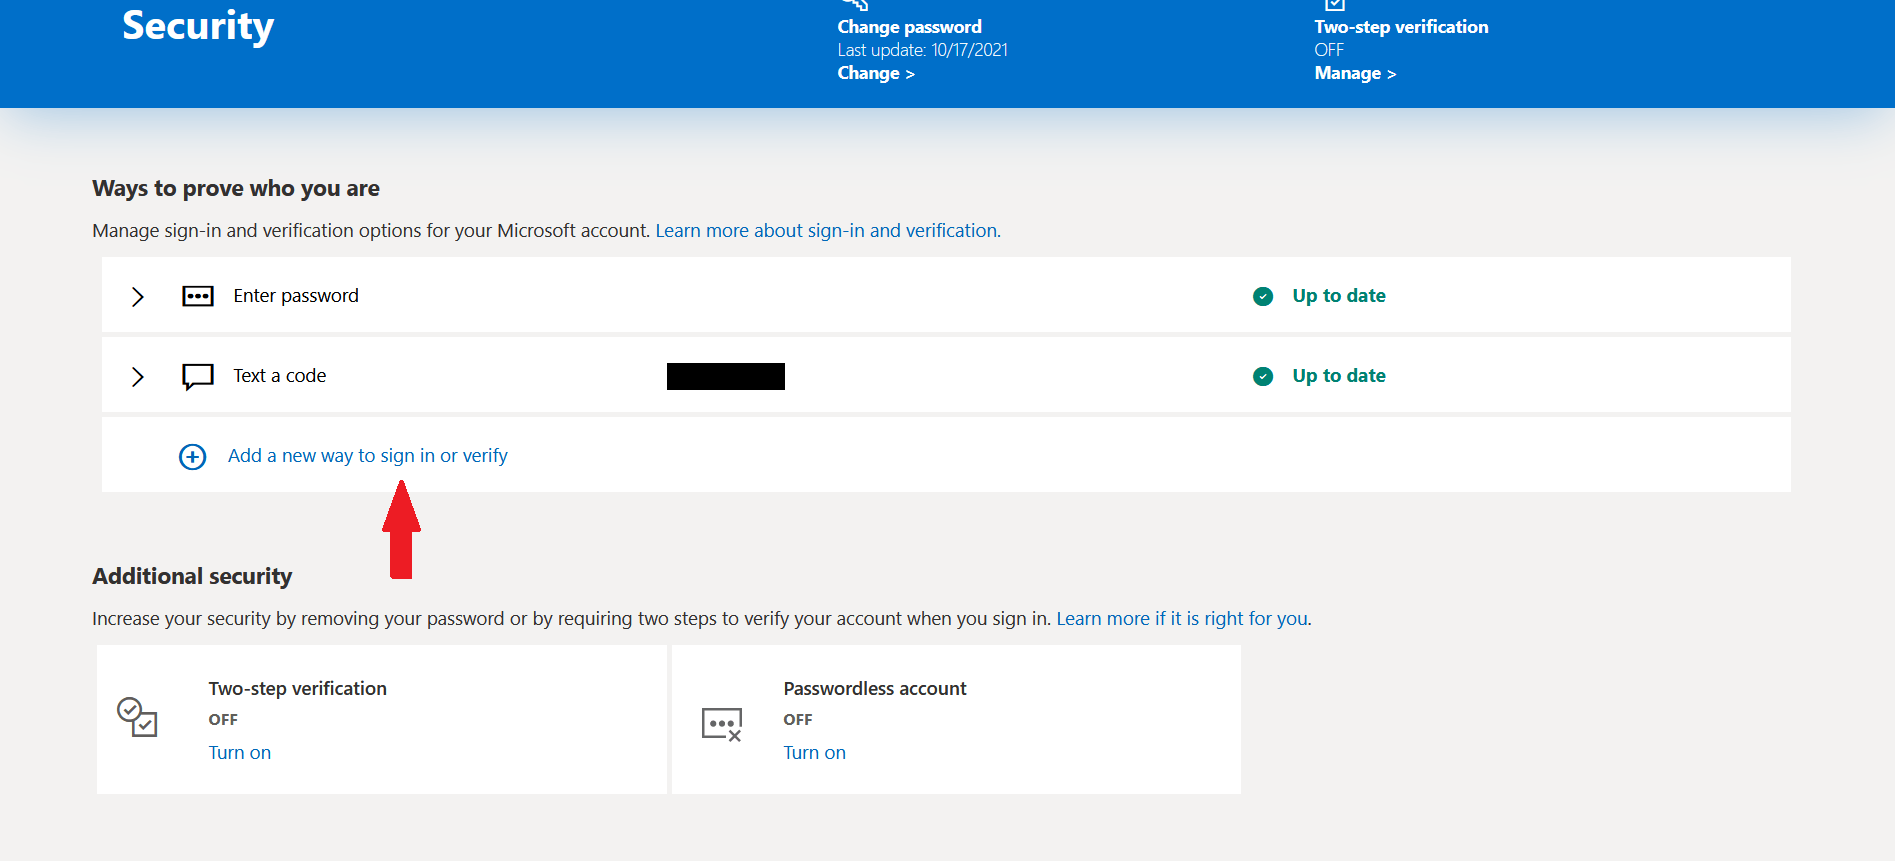
Step 3: Define Ways to Prove Your Identity
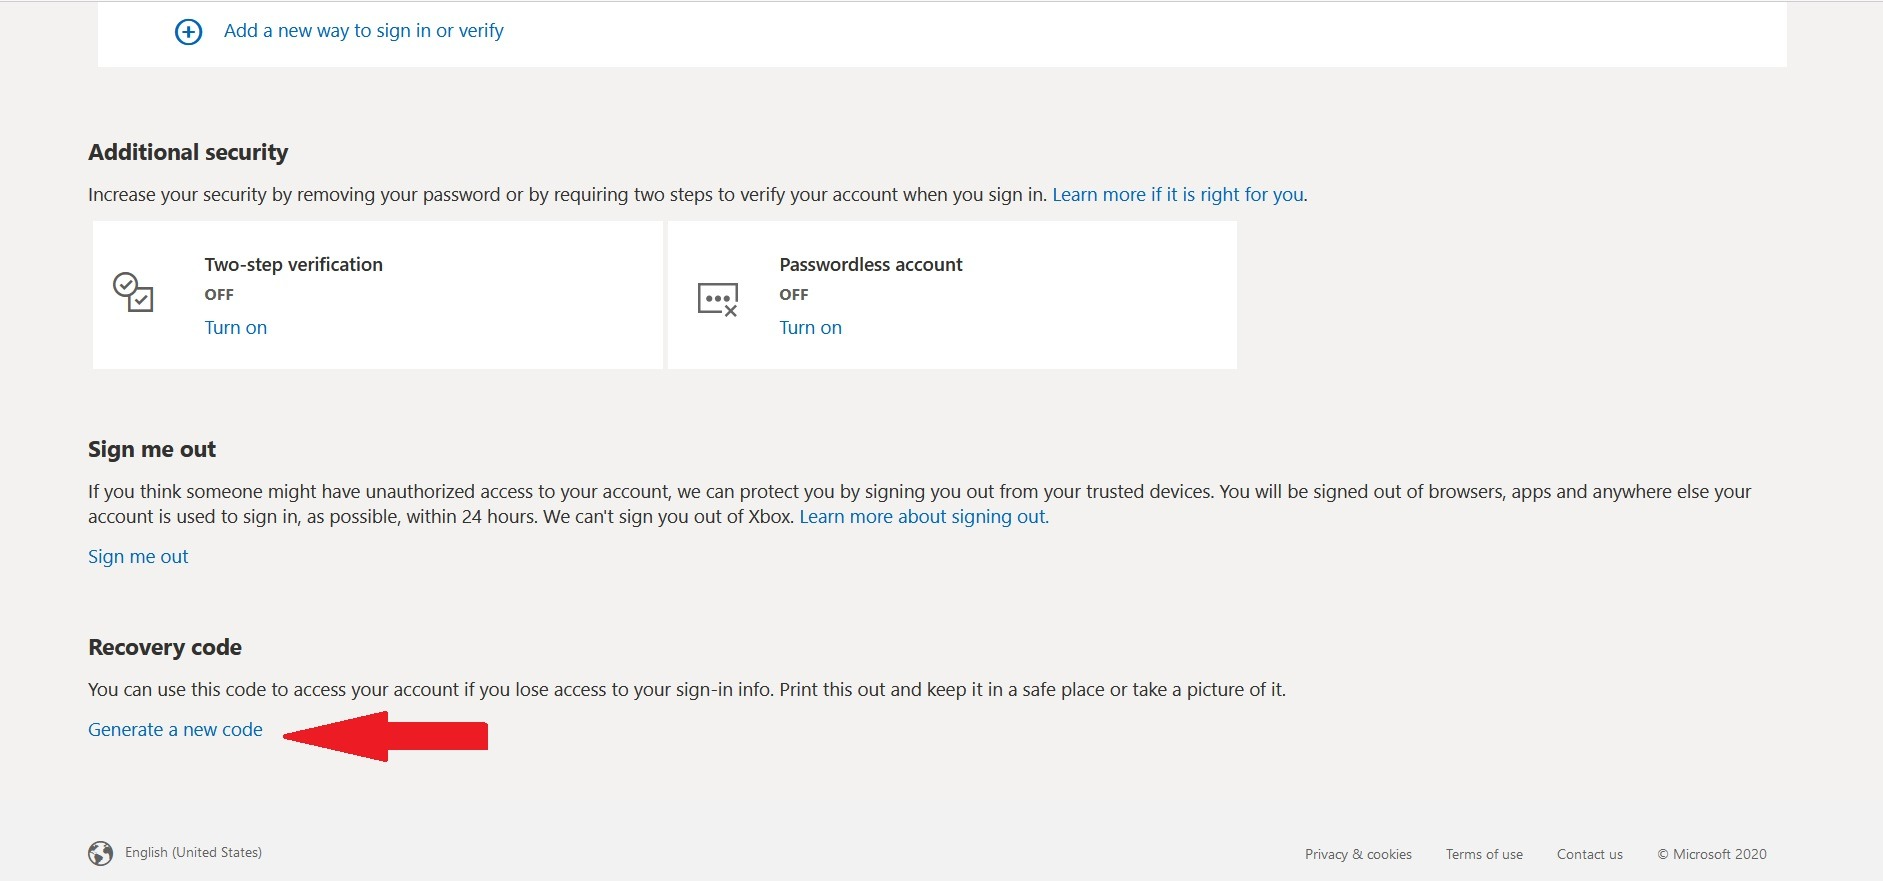
As I mentioned before, Windows 10 two-factor authentication is easy. But, in order to enable two-factor authentication on Windows 10, you will first need to register a secondary email or your cell phone number as means of proving your identity. So, in the section titled “Ways to prove who you are,” you must click on “Add a new way to sign in or verify”.
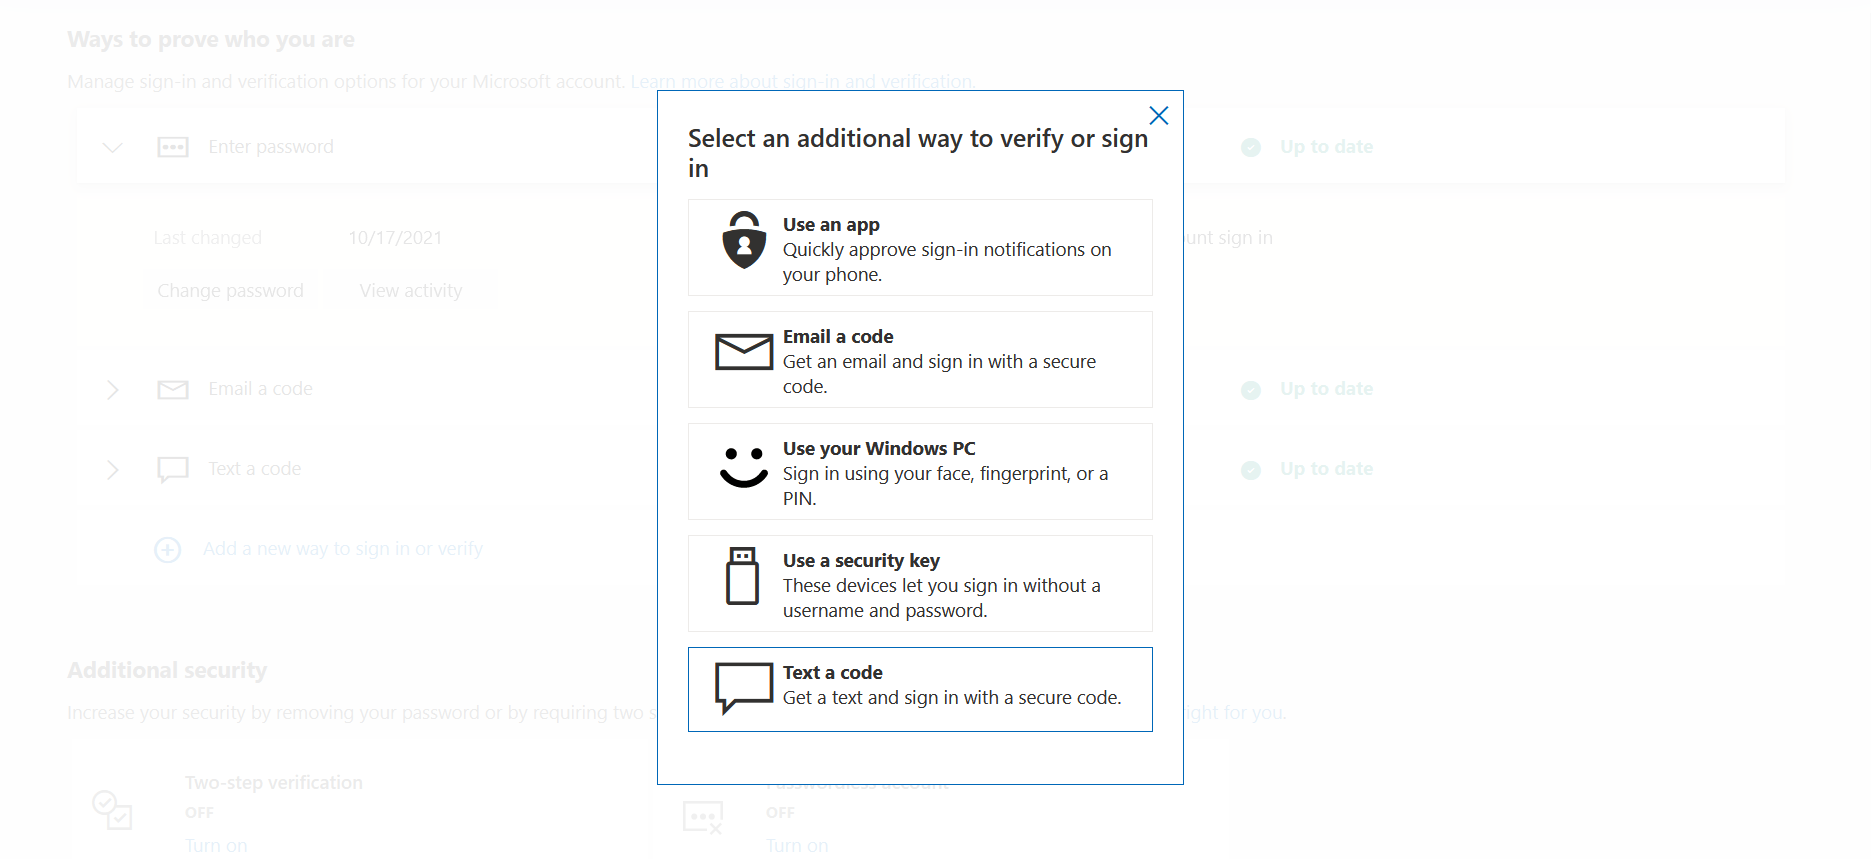
A new page will show up listing all the ways in which you can prove your identity. You can choose one or more of these options. As shown in the image below, there are five different ways to verify your identity and enable two-factor authentication on Windows 10.
Step 4: Turn on Two-Step Verification
In the Additional Security section, click on Turn on under Two-Step Verification. After clicking this button you have completed enabling two-factor authentication on Windows 10. But, just to make sure that you will never lose access to your account, there is one more step that you have to take.

“Also read: How to Fix the HTTPS Not Secure Message in Chrome”
Step 5: Generate Recovery code
Once you have turned on two-step verification, you will need to generate a recovery code. If you ever lose your username and password or lose access to your account in any way, you can use this recovery code to take control of your account again. In the Recovery Code section, click or tap on Generate a new code.
As shown in the image below, a 25-characters long combination of numbers and letters will be generated, which you can print or write down somewhere safe.
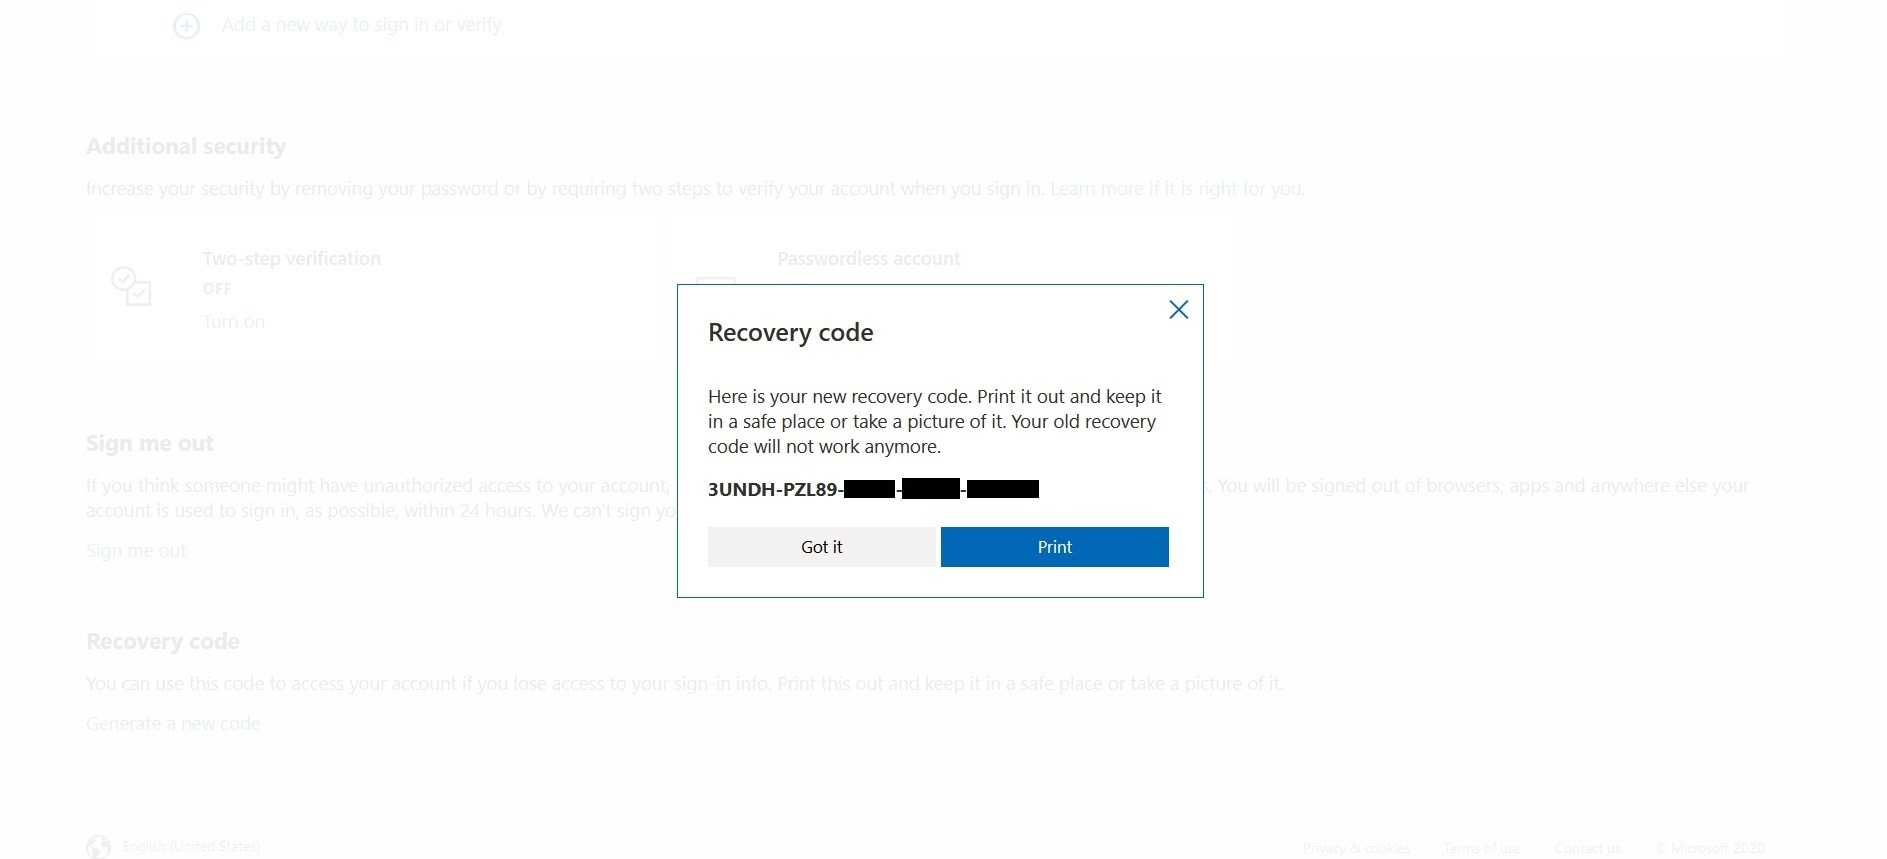
Now whenever you lose your password, you can use this recovery code to sign in to your account.
 Windows 10 VPS Hosting
Get yourself an efficient Windows 10 VPS for remote desktop, at the cheapest price out there. FREE Windows 10 running on NVMe SSD storage and high-speed internet.
Check Out Windows 10 VPS PlansWhat Now?
I think it’s safe to say that by now you can effortlessly enable two-factor authentication on Windows 10. Although you cannot use two-factor authentication for the Windows login screen, enabling your Microsoft two-factor authentication is still a further layer of security that protects your information. That’s only one of the many steps you should take to make your Windows more secure. Here at Cloudzy, we offer a comprehensive package: a free Windows operating system of your choice, 1-click OS installations, and hardware optimized for Windows. Our Windows 10 VPS features layered security measures, including an AI-powered firewall and smart DDoS protection as well as hard-wired safety rules. And it’s not just about tighter security, there are all sorts of cool use cases for Windows VPS. For even more information, visit our Windows 10 VPS page. Also, in case you have any questions, feel free to submit them using our contacts page or in the comments below.


![How to Make a Modded Minecraft Server? 👾 [2024 Guide]](https://cloudzy.com/wp-content/uploads/How-to-Host-a-Modded-Minecraft-Server-1-420x234.png)


0 Comment